Get money for software reviews
Leave thoughtful review and gain regular revenue. Learn more about reviews
According to various estimates, in order to obtain basic knowledge about a programming language, it takes from 6 to 12 months. Today we will review a product that allows you to create web applications without coding. Bubble.io is a SaaS platform where you can design a functional web service.
So let’s start our Bubble review with a general overview. Bubble is a Swiss knife of sorts among online web building tools. It incorporates the developing process, interface design, publishing. In order to understand how to use Bubble, it is best to go through their free training of 12 lessons. These will be simple step-by-step instructions during which test applications will be created and setting up their interaction will be shown.
First, we’ll briefly go over key parts of this web builder, and then try to launch a draft (test) web page of our own to see how it all works. The interface of Bubble sticks to a single overall concept, only certain menu sections may differ. For example, 3 toolbars are used to customize the appearance:
Even in the free version, users have access to a large number of different elements that can be used to build their web application. First of all, with API, users can create integrations with third-party web resources for data exchange. Also, it can be used to connect (if necessary) custom scripts such as Javascript, Python, etc. Another way to expand the functionality of the application is the ability to add plugins: interface elements, payment services, forum or whatever. Bubble plugin library contains thousands of diverse add-ons and integrations.
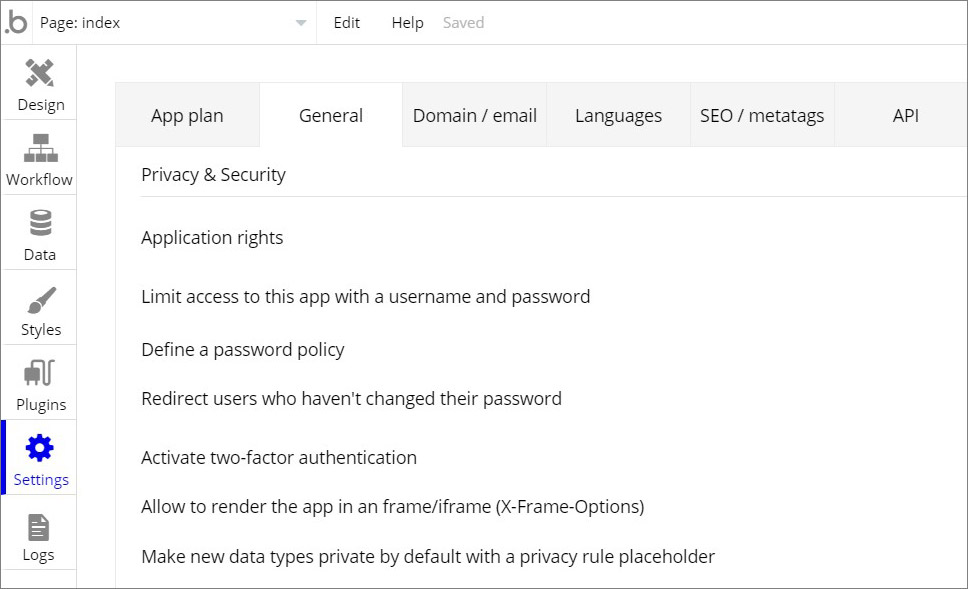
All Bubble tools can be divided into back-end (algorithms and databases) and front-end (appearance). Since Bubble is primarily intended for web applications, it also has tools for hosting and SEO. Another great advantage is access to the source code, if need be for customers, so in case of blackout or some unforeseen circumstances, data can be restored.
Let’s start with front-end development in Bubble.Visual editing of web applications avoids long scripts and makes the process accessible to everyone. A library of elements includes 30+ pre-configured elements.
The key part of the front-end management is located in the Design tab. The principle is drag-and-drop, so it is as easy as it gets. Bubble has a modern version of the coordinate grid. When you drag an element, its size in pixels and guides along it will be displayed. Layers are also possible, so the elements can be put on top of each other.
The upper panel of the work window contains the traditional developer tools for the IDE. In particular, here you can undo the last actions, change the display options on the canvas, or adjust the scaling.
Management of various working windows in Bubble is, as if they were separate pages of the site. The history of changes saves all actions and can quickly roll back unwanted changes.
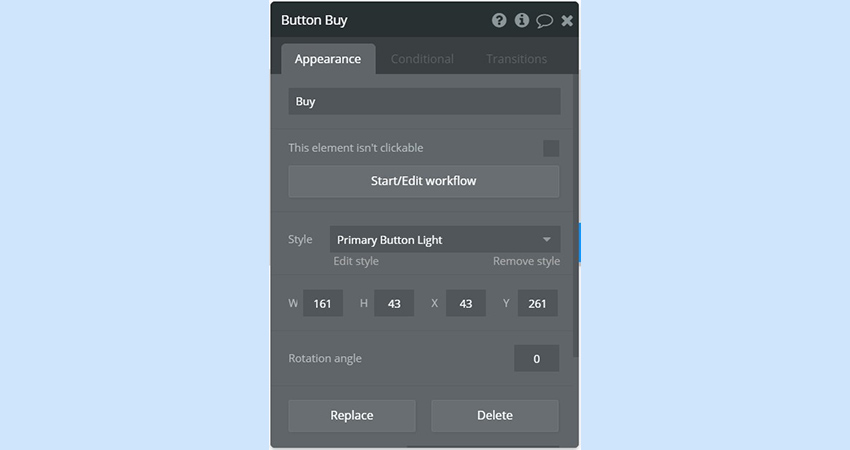
Preview tool is also available, so all changes can be seen and tested without publishing the app. After placing any element on the canvas, you can edit its properties. To display the item settings panel, just click on it. Its appearance depends on element type, e.g. for a button click settings will be available, for a text field the source will be editable. In general, this control panel for elements allows to control its size, parameters, transitions, etc.
For beginners, Bubble has small video tutorials and reference materials for each web/design element (icons in the upper right corner). Also there is a tool for creating text notes for elements. Tip: use the Responsive tab to preview on different devices.
Read next: 25 top web development companies.
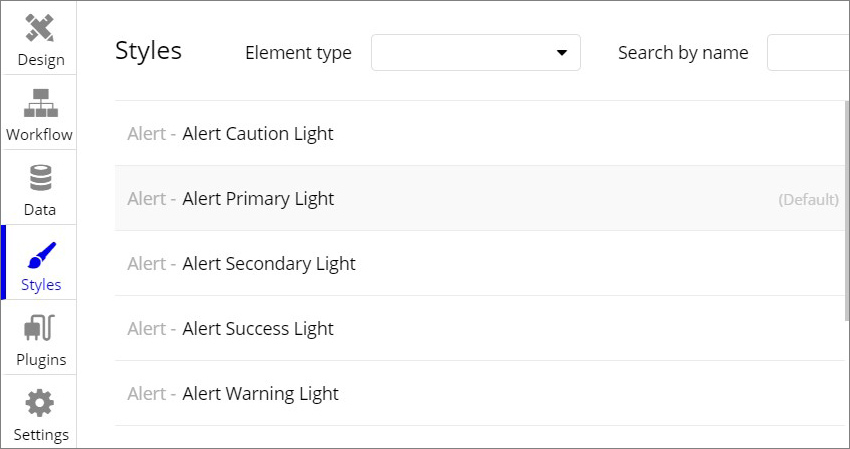
Bubble tools allow to customize the appearance of all elements on the canvas. Style is the basis of any element appearance, a lot of styles are available by default, and it is possible to create your own styles. In Bubble, styles allow you to reduce time for designing elements, since the same style can be used in several elements or windows. Additionally, there are ready-made themes in the official store.
Almost all aspects of appearance are set for customization:
Now, we move to back-end development. Bubble has appropriately adapted the key principles of programming to their needs. Under the hood of a web page created in Bubble, it is possible to implement such necessary tasks as: launching events, managing databases, adjusting logic algorithms, etc.
Read next: Best e-commerce web developers.
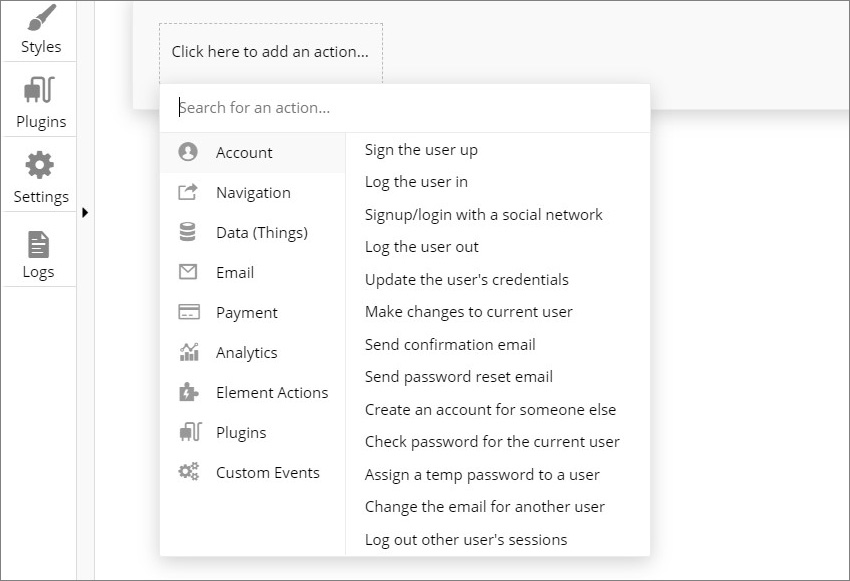
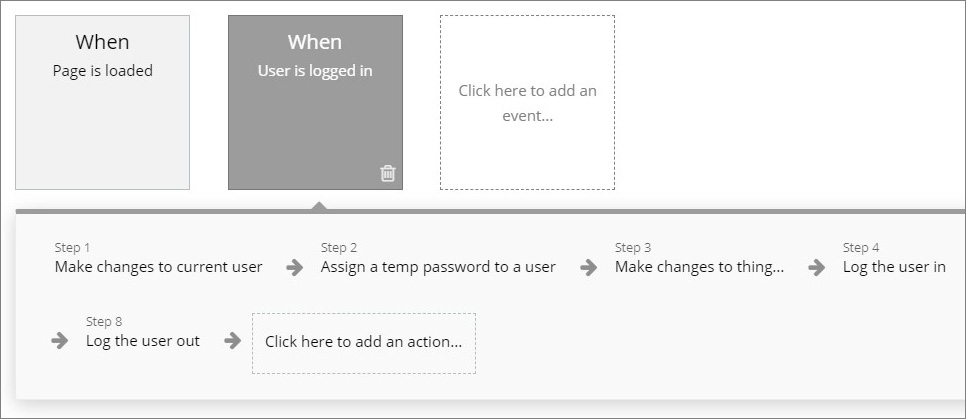
Traditionally, back-end refers to the invisible part of applications. In Bubble the main way of organizing interaction with visitors is Events. This is a traditional approach to application development, adapted for an online platform by Bubble. Event setup consists of two steps:
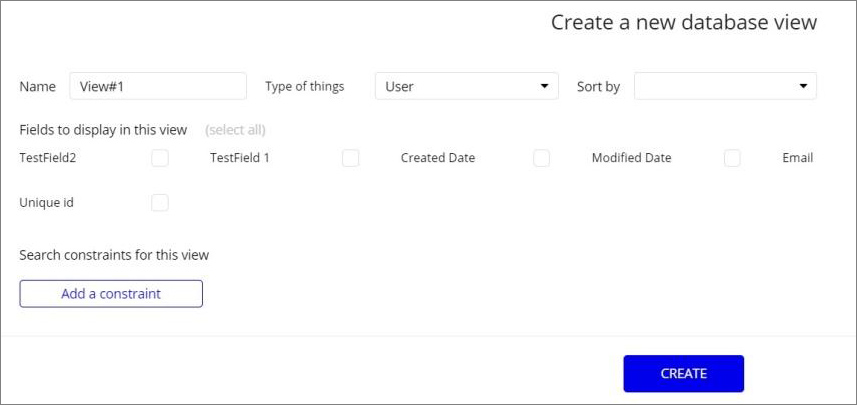
The creation of full table-type databases and their fields has been the basis of web applications and sites for years, and it is constantly getting better optimized. Bubble has managed to minimize coding even in this area, making it faster to create a database than performing circular queries such as Create Table A, Insert value B, etc. Of course, those are still in place, although are hidden from a general view somewhere on a server. Database editor and rights management system are good enough to configure access and hierarchies.
Bubble database editor consists the three traditional parts:
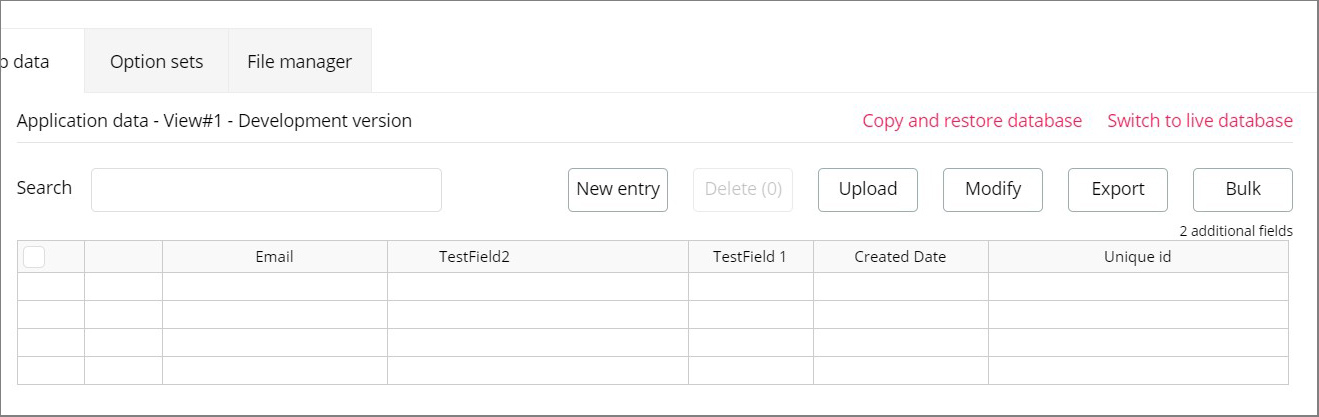
Tip. Bubble allows you to make changes to an application, without a need to suspend it. To access the database without pausing a website, use the Switch to Live Database feature.
Read next: 8 best web design agencies for hire.
The Bubble tariff grid includes 4 offers, one of which is free. All are billed monthly under an annual subscription.
Hobby | Personal | Professional | Production |
Free | $25 | $115 | $475 |
2GB | 10GB | 20GB | 50GB |
1 version | 1 version | 10 versions | 20 versions |
12 hours history | 7 days history | 14 days history | 1 year history |
Email support | Email support | Priority support | Priority support |
Production package includes the ability to get additional server capacity, 2-factor authentication, and 15-person collaboration simultaneously. It is also worth noting that user applications are hosted on Bubble servers according to the Shared server principle. If a website grows in traffic, it would make sense to switch to a separate hosting. Purchasing a dedicated service is also available, though only by personal request.
Talking about functionality and tools would be worthless for Bubble review without trying to actually launch a website. That’s what this service is made for. So our goal is simple - design and launch a main landing page for an imaginary “Pizzeria Fabricio” small business. Here is how it has turned out.
Step 1. To start off we need to create a new project. On the account page, click Create App and fill out name, type, purpose, description (only project name is required, other fields are optional). The name cannot contain spaces and special characters, as it will be used to create a website URL. The domain, by the way, will look like projectname.bubble.io. Paid subscriptions allow custom domains.
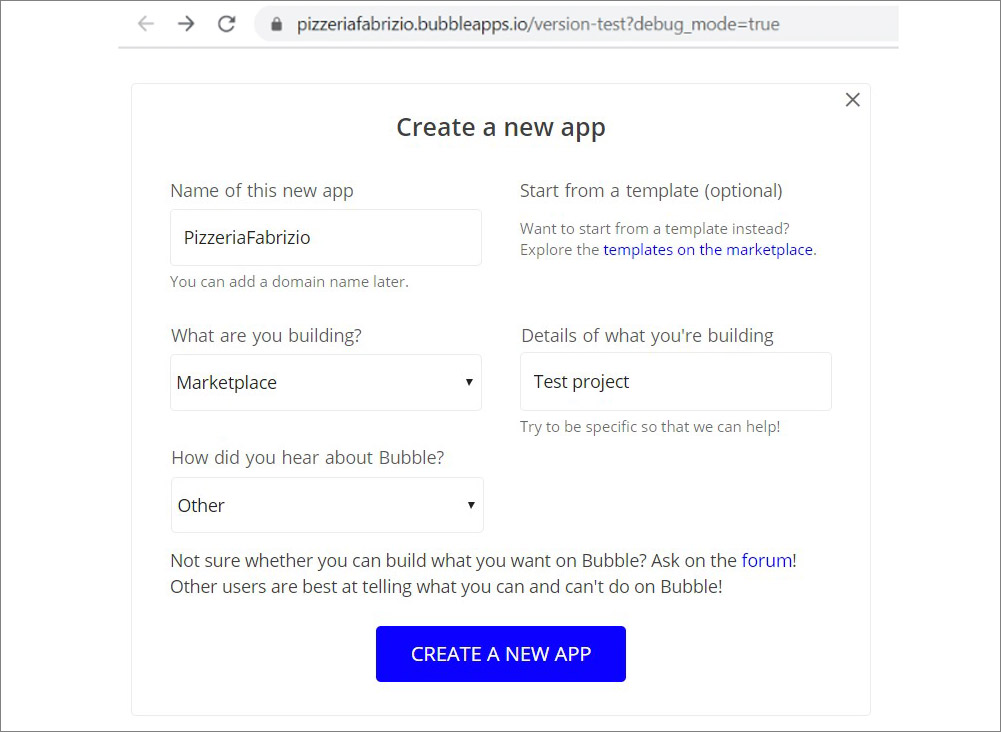
Step 2. On the next step, the Application Assistant appears. It helps choose a design template in accordance with user answers. We choose Start with a blank page option.

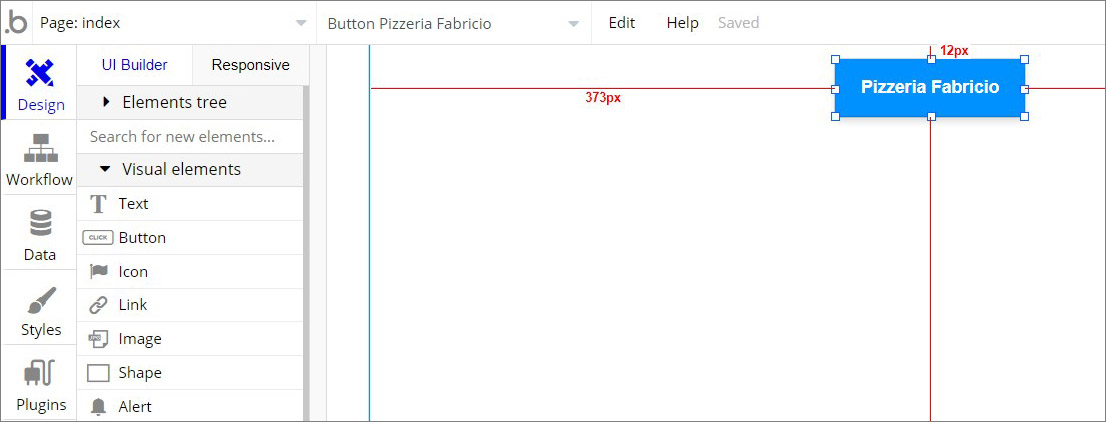
Step 3. We start with a header which will consist of the name of our pizzeria, and we’ll put it at the top, in the center of the page. In the future, this element will be clickable, so we will use the Button element. We stretch out the button to make it bigger.
Step 4. Let’s add the Italian flags on the sides - for local flavor. Place the Image element on the canvas and select Upload in properties. Duplicate the image to make it look symmetrical.

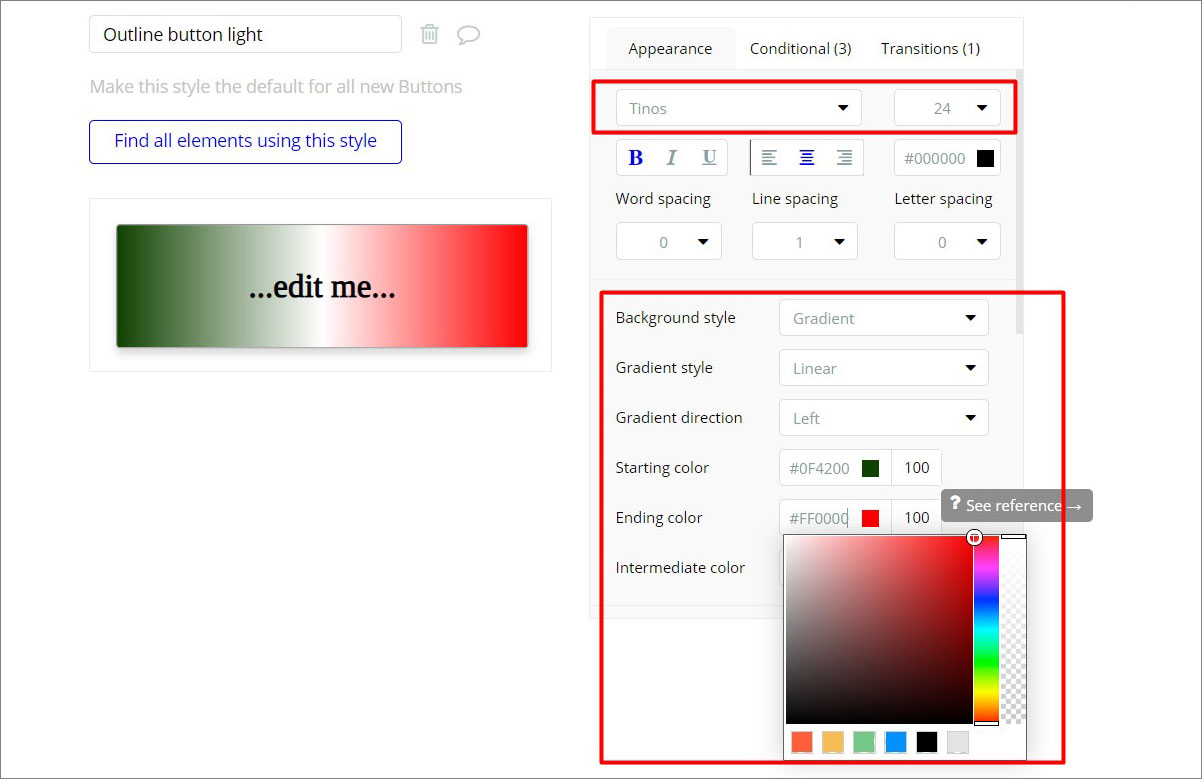
Step 5. Let’s try to make our button more lively. We’ve changed its style to Outline Button Light, then added a gradient (Edit style). In the style editor, we’ve changed the font to Tinos and increased size to 24. Then set the a three-level horizontal gradient of red, white and green. After completing all the settings, we return to the Design tab to see the result.
Step 6. Let’s add a block of items to buy (pizza). To do this, we place a picture (preview) on the canvas, 2 text elements (name and price) and a button (Buy). We don’t want to adjust the dimensions of the block manually, so we group it via the Group element. Place the Group element on the canvas and move all the elements for the future block inside it.
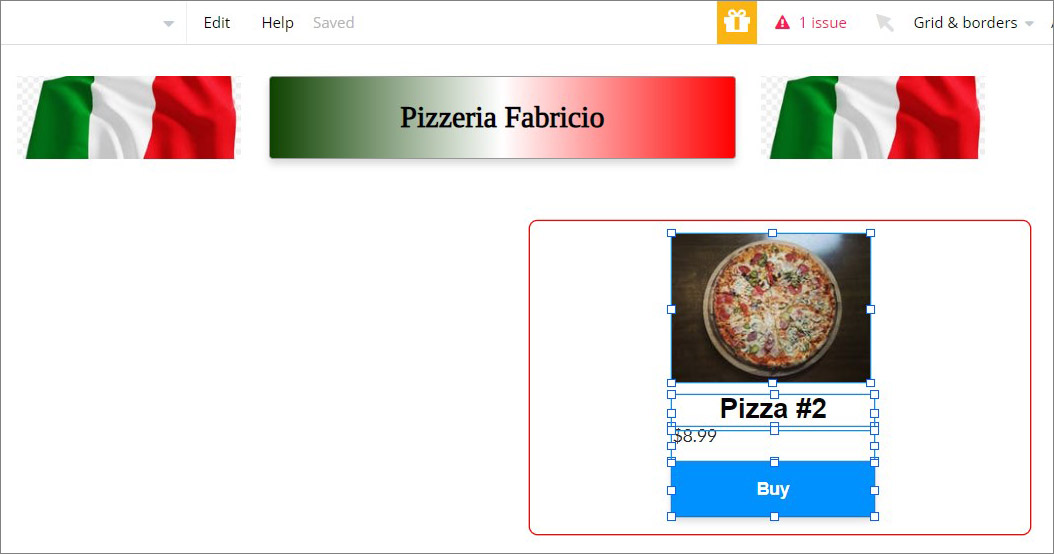
Step 7. Now we fix styles for text labels inside the block - center the text and make the price red. We have grouped the elements, so we can quickly create copies of it. We create three more blocks with items using copying and fill them with other data.
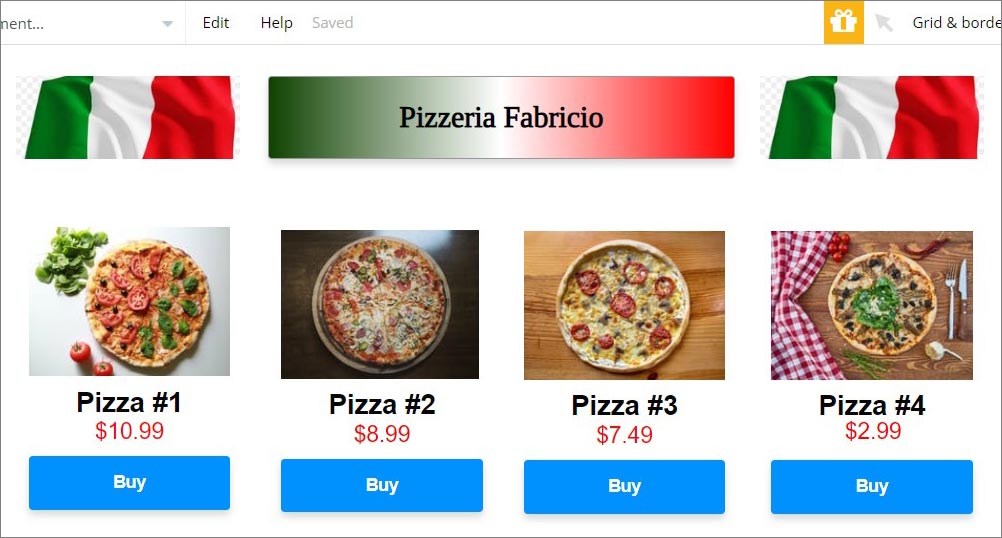
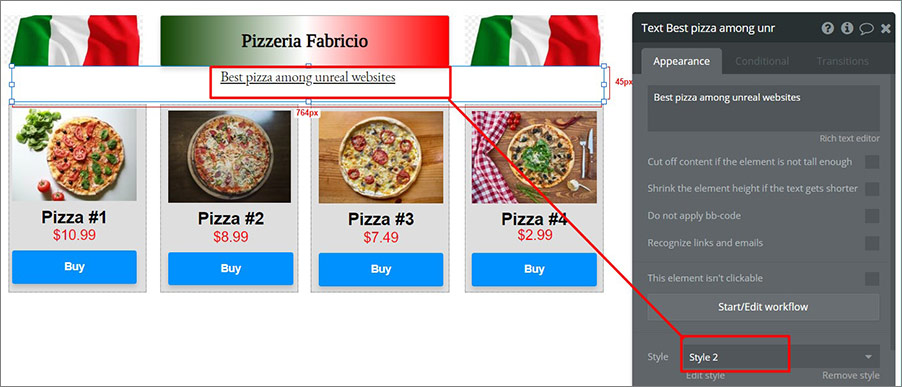
Step 8. Let’s add some background to the blocks. To do this, select the Group element from one of them and change its background to gray using the style editor. Changes apply simultaneously to all blocks that use this style. We’ve forgotten about one important detail - a slogan for pizzeria. Add a text field and make a custom style for it.
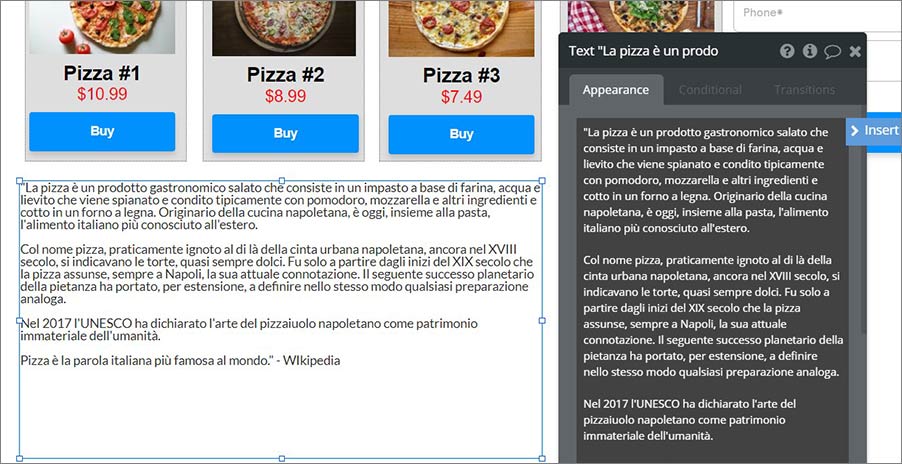
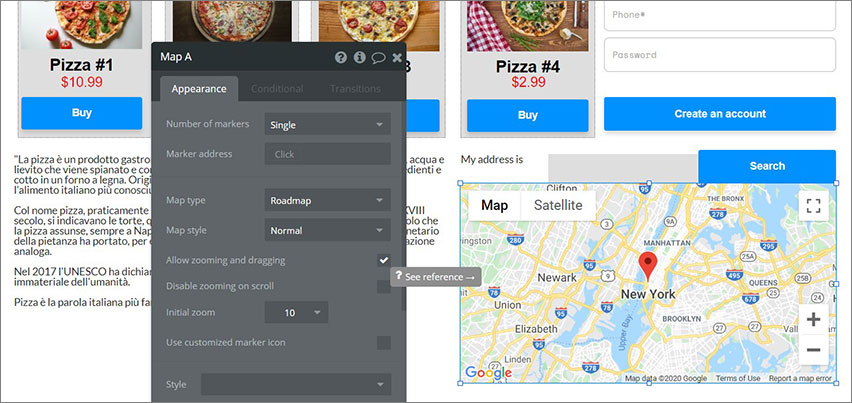
Step 9. On the right side of the screen, we have a lot of free space so we’ve decided to add a form for customer signup. Also, at the bottom we want a personal appeal from Fabrizio, the owner.
Step 10. One final touch, a map search by city. For this we need text and map boxes. For a real site, the button would have an Event search in the list of pizzerias, which would be stored in the database. Then a last check to see if everything is OK. Also a quick advice: always make sure that element edges are snapped to other elements’ edges, otherwise size may be unpredictably distorted when the page is scaled.
And so our page is ready. To test it or debug it is better to use the preview mode. A button to go live is available in the upper right corner. All in all, it took us about 40 minutes to create this page, which is quite good as for the first ever experience in Bubble.
While we were preparing this review, we also examined online feedback from users and 95% of them were positive, which is incredible as for such specific and complex service. Creating an application in a traditional IDE, organizing a test hosting, setting up public access and so on requires much more time. With Bubble, all that is available in a single place, just select a tab. Novice users can use Bubble to compile a web app without coding skills or additional software. And users with programming skills can expand the possibilities of Bubble through plugins and custom scripts.
Read next: Leading WordPress development companies.
Month
Month